


WooCommerce Firebase OTP Login – Mobile Number Login & Verification (One-Click Login, Auto User Registration)
Original price was: ₹1,000.00.₹399.00Current price is: ₹399.00.
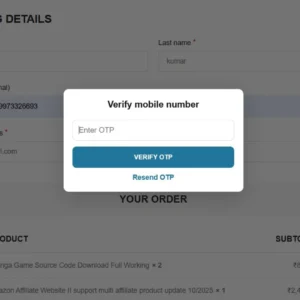
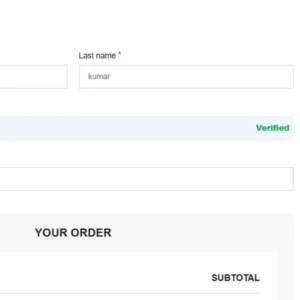
Enable secure and password-less login on your WooCommerce store using Firebase OTP. Customers simply enter their mobile number, receive an OTP, and log in instantly—without passwords. Includes auto user creation, resend OTP, invisible reCAPTCHA, and a modern mobile-friendly UI.
| Feature | Available |
|---|---|
| Custom Mobile UI | ✅ |
| Firebase OTP System | ✅ |
| Resend OTP | ✅ |
| 30s Timer | ✅ |
| Auto login | ✅ |
| Auto registration | ✅ |
| WooCommerce integration | ✅ |
| Default login form removed | ✅ |
Create Firebase project and enable Phone Auth (step by step)
-
Go to https://console.firebase.google.com and sign in with a Google account.
-
Click “Add project” → give it a name (e.g., “MyShop-OTP”) → click through and create the project. (You can disable Google Analytics if you want.)
-
In the project console, open Build → Authentication → click “Get Started”.
-
In the Sign-in method tab find Phone and click it → Enable → Save.
-
Optionally, configure reCAPTCHA settings (Firebase uses reCAPTCHA internally for web phone sign-in). You generally do not need to supply your own site key — Firebase does the invisible reCAPTCHA via the JS SDK.
-
-
Still in Authentication → Sign-in method, add your site domain under Authorized domains (top of the Sign-in method page). Example:
example.comandwww.example.com. Also addlocalhostif you test locally. -
(Optional but recommended for testing) Under Authentication → Sign-in method → Phone you can add Test phone numbers. These allow you to verify OTP flows without sending real SMS. Add a test number and a matching test code (e.g., +91 9999999999 -> 123456). This helps during development so Firebase returns immediately.
-
Create a Web App in Firebase (so you can get the config object):
-
Go to the project Overview (the gear icon) → click Add app → choose Web (</> icon).
-
Enter an app nickname (e.g.,
checkout-web) and click Register app. -
Firebase will show your Firebase config object — looks like:
-
Copy that entire object — you will paste it into the WordPress code (replace placeholder config already present in the code).
-
-
Make sure the Authorized domains includes your site and
localhost(for dev). If you forget this, Firebase signInWithPhoneNumber will fail with a domain error.
Notes:
-
For production SMS, Firebase will send real SMS and charges may apply depending on your usage and country limits. For initial development and testing, use test phone numbers to avoid real SMS costs.
-
reCAPTCHA/invisible reCAPTCHA requires HTTPS in production. If you test on HTTP (non-localhost), you may get warnings or failures.
How to install the code into WordPress (step by step)
Install free plugin for insert the code Download free plugin
Go to WordPress and click Snippets. Then click the Import option at the top, upload the purchased code, and turn on the toggle button.
Replace Firebase config in code
Inside the inline JS in the code you will find the firebaseConfig = { ... } object. Replace that entire object with the web app config you copied from Firebase console (Part A step 7). Example:
Important: this is safe to include client side — the API key in Firebase config is meant to be public for client usage. But still protect your Firebase project rules on the server side if you use other services.
📦 How to Install (Step-By-Step Guide)
Option 1: Add into Theme’s functions.php (Simple Method)
-
Go to: WordPress Dashboard → Appearance → Theme File Editor
-
Open: functions.php
-
Scroll to the bottom
-
Paste the entire code you shared
-
Save file
-
Go to: My Account page → Mobile OTP Login will appear.
Option 2: Install Free Plugin
Install free plugin for insert the code Download free plugin
Go to WordPress and click Snippets. Then click the Import option at the top, upload the purchased code, and turn on the toggle button.
Related products


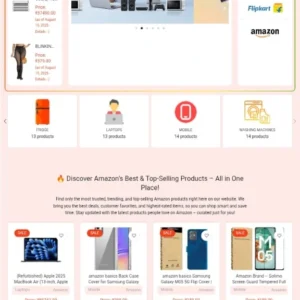
Amazon Affiliate Website II support multi affiliate product update 10/2025
- Amazon
- Flipkart
- Others..
- View pdf for website : Click website II Check pdf
- Website demo : Click website II Check pdf
- Last update : October 2025

ViserMart – Ecommerce Shopping Platform


WoodMart – Multipurpose WooCommerce Theme
- SEO-Friendly & Fast Loading
- Fully Responsive Design
- Elementor & WPBakery Compatible
- Powerful WooCommerce Integration
- 90+ Pre-Built Demos & Customization Options
Reviews
There are no reviews yet.